Introduction
In my previous article (MultiThreading Using a Background Worker, C#), I talked about Background Workers, which were the easiest and most effective way of creating multi-threaded desktop applications. However, this technique is becoming obsolete, now the new Task Factory is here. There are many nice articles on this subject, detailed and well organized, like: Task Parallel Library and async-await Functionality - Patterns of Usage in Easy Samples, and the 6 part tutorial: Task Parallel Library: 1 of n. However, I wanted this article to be a sequel of my previous one, and to show you how to use the basic features of the Task Factory. I think that users who are migrating from Background workers will find this easy to follow since I wrote it as close as it can get to the technique we used in background workers, I intended not to use lambda expressions, although I encourage you to use them.
Background
Developers who have written desktop applications know how it feels when performing heavy duty operations, or when requesting data from a remote location. The user interface will freeze till the operation is completed. This is because the application is running on a single thread, and when this thread is busy doing some other stuff, the application will freeze till this thread is ready once again to render the user interface to the user. Here, multithreading comes to the rescue: you delegate your heavy work to another thread, and thus your application will remain responsive during the time of the operation. you can also make use of the multi-processing capability of the user's machine to distribute the job among different threads/tasks. For our sample, we will be using theTask Factory class.
Implementing the Sample
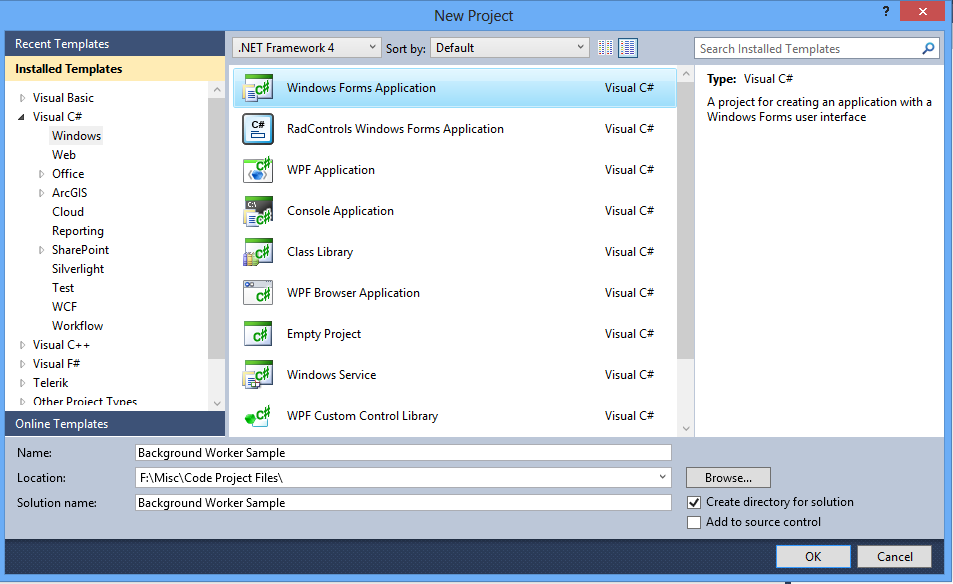
I will be using Visual studio 2012 for this project. Unfortunately, some of the features used here are not available in Visual Studio 2010 or earlier (like the async keyword), or in the best cases, hard to add and will end up in hidden bugs.
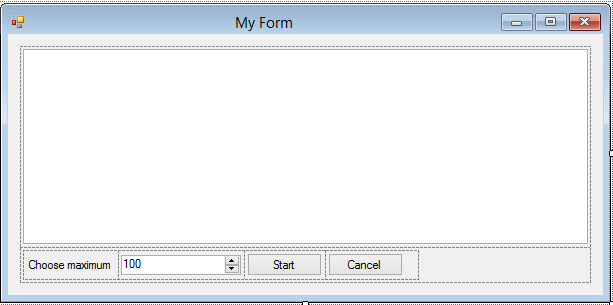
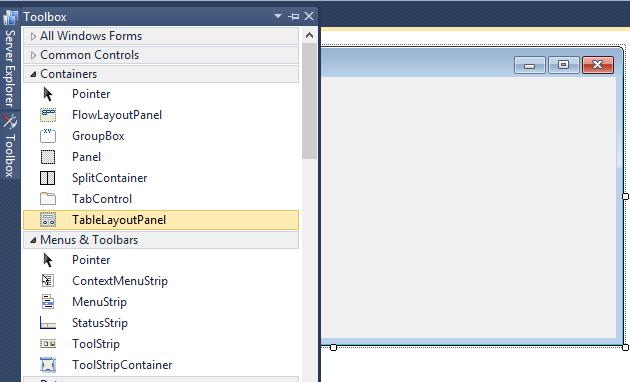
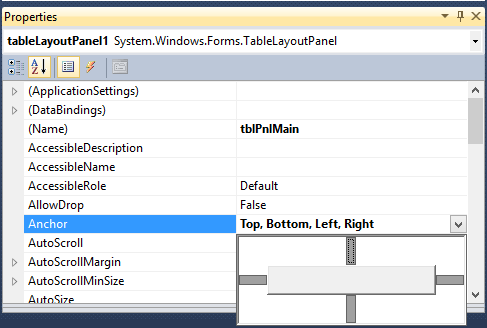
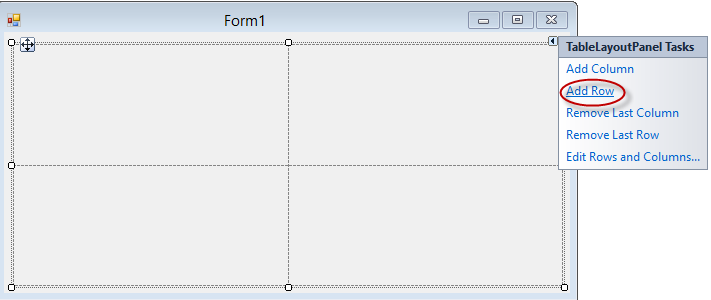
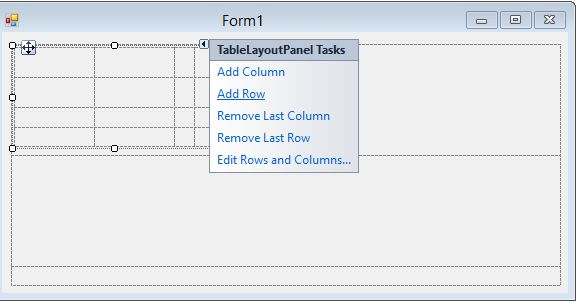
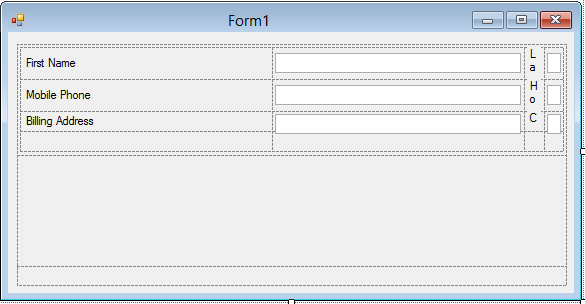
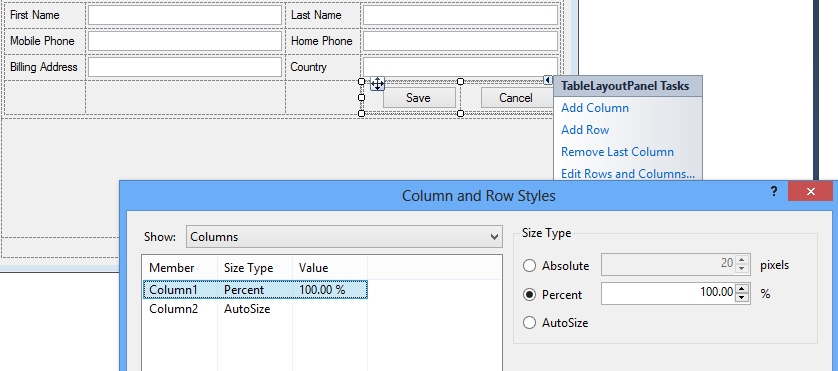
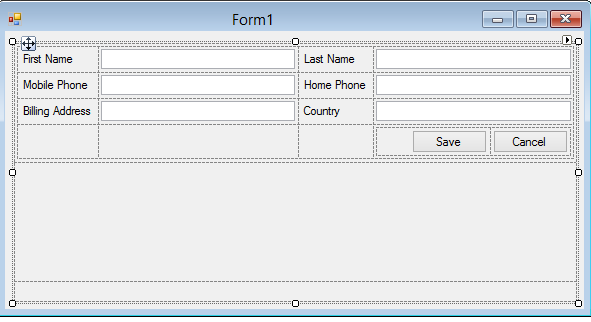
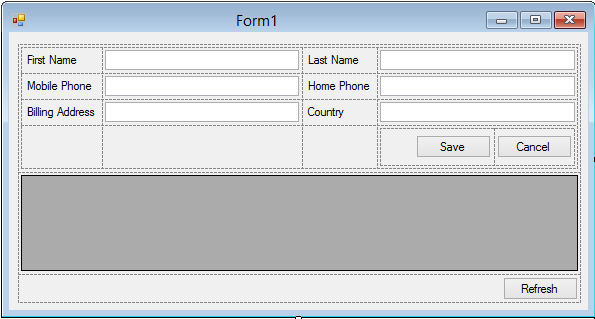
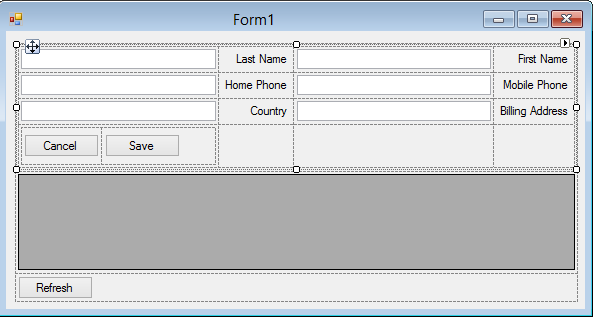
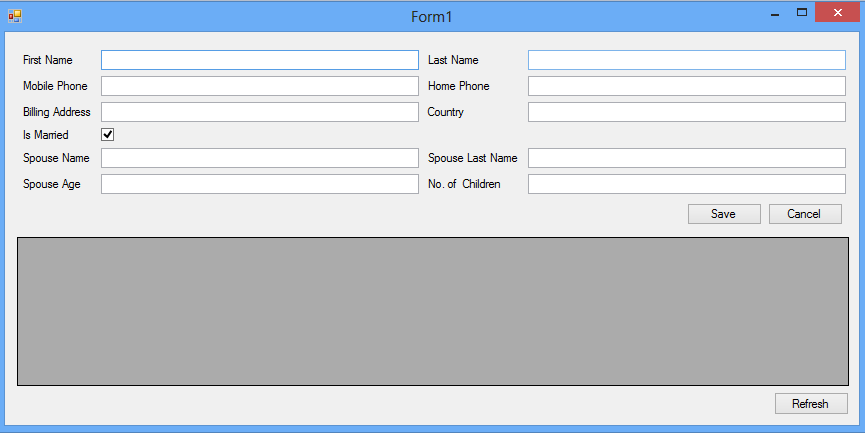
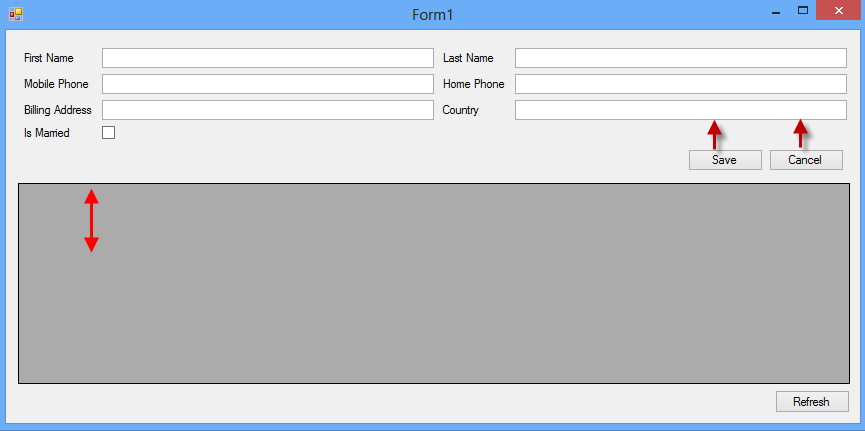
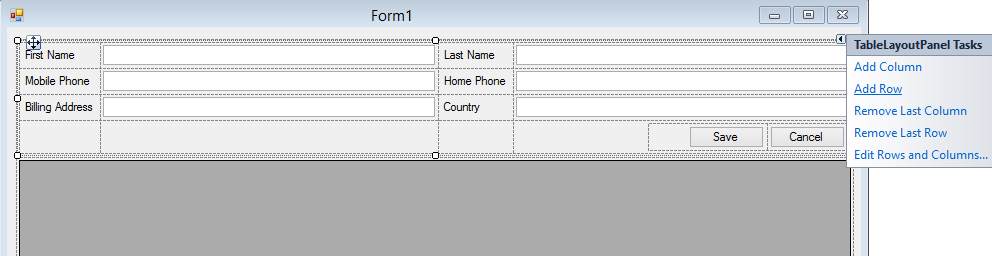
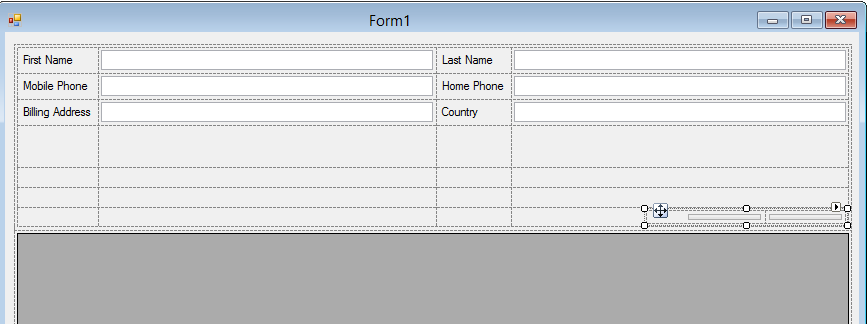
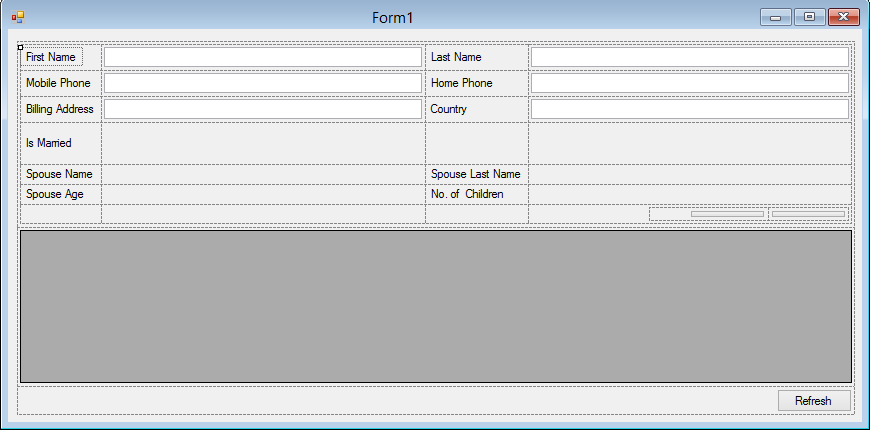
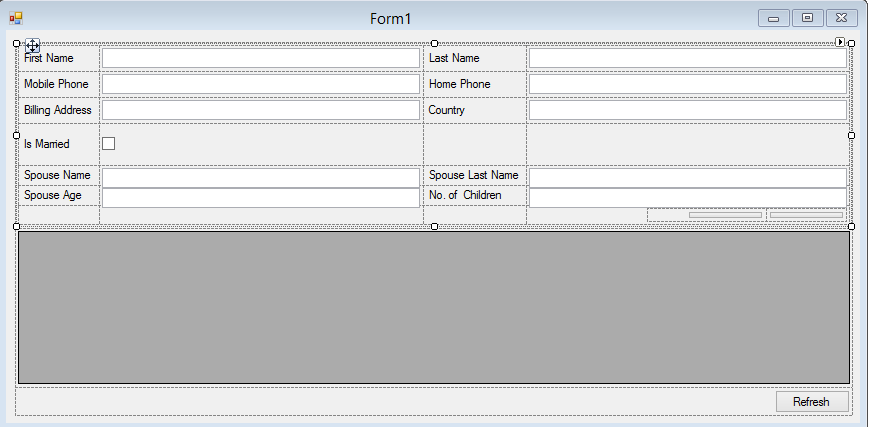
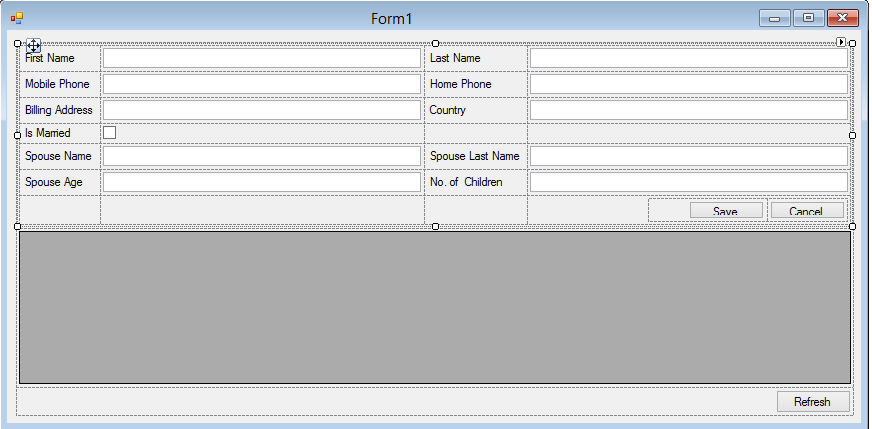
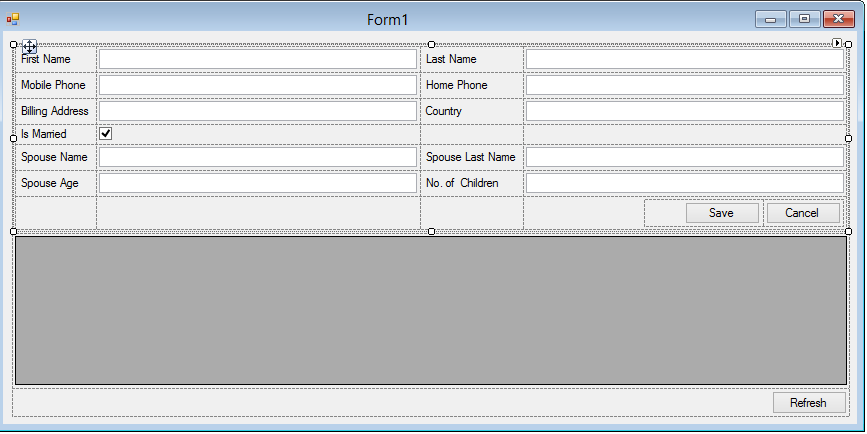
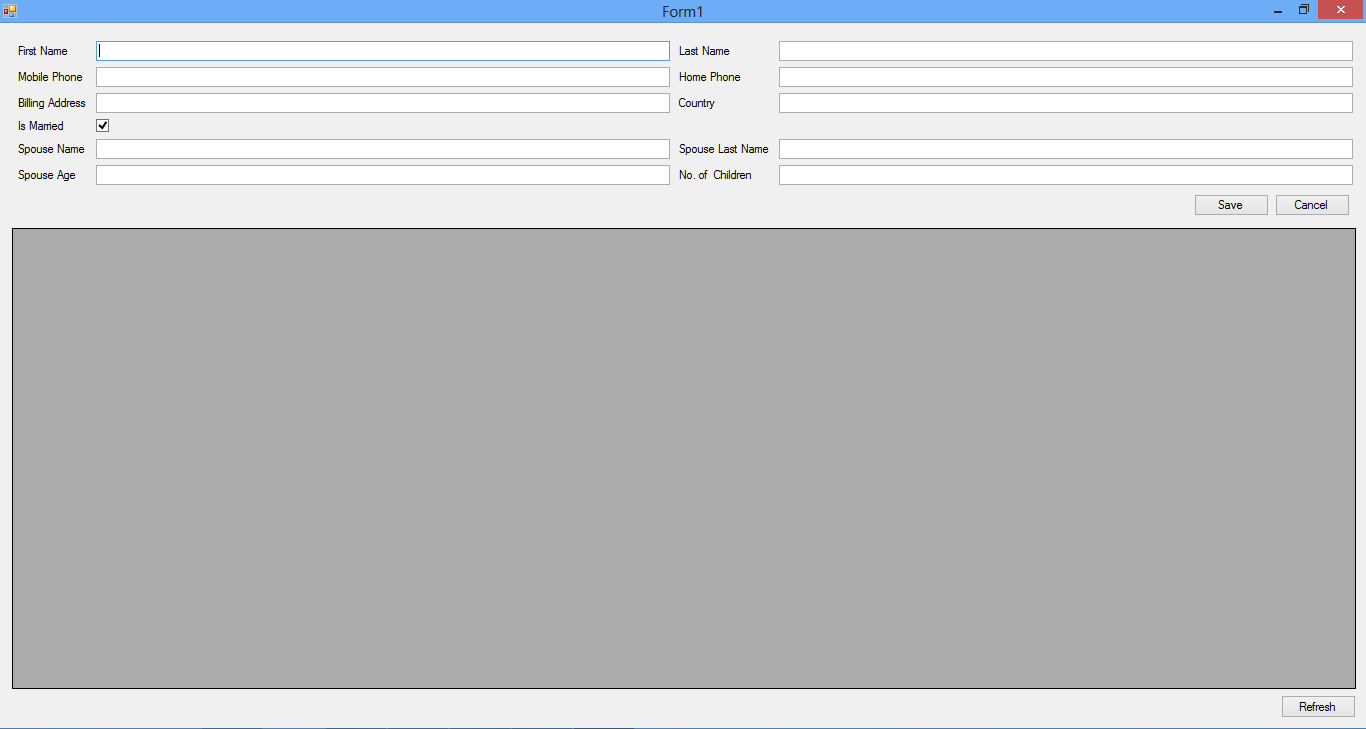
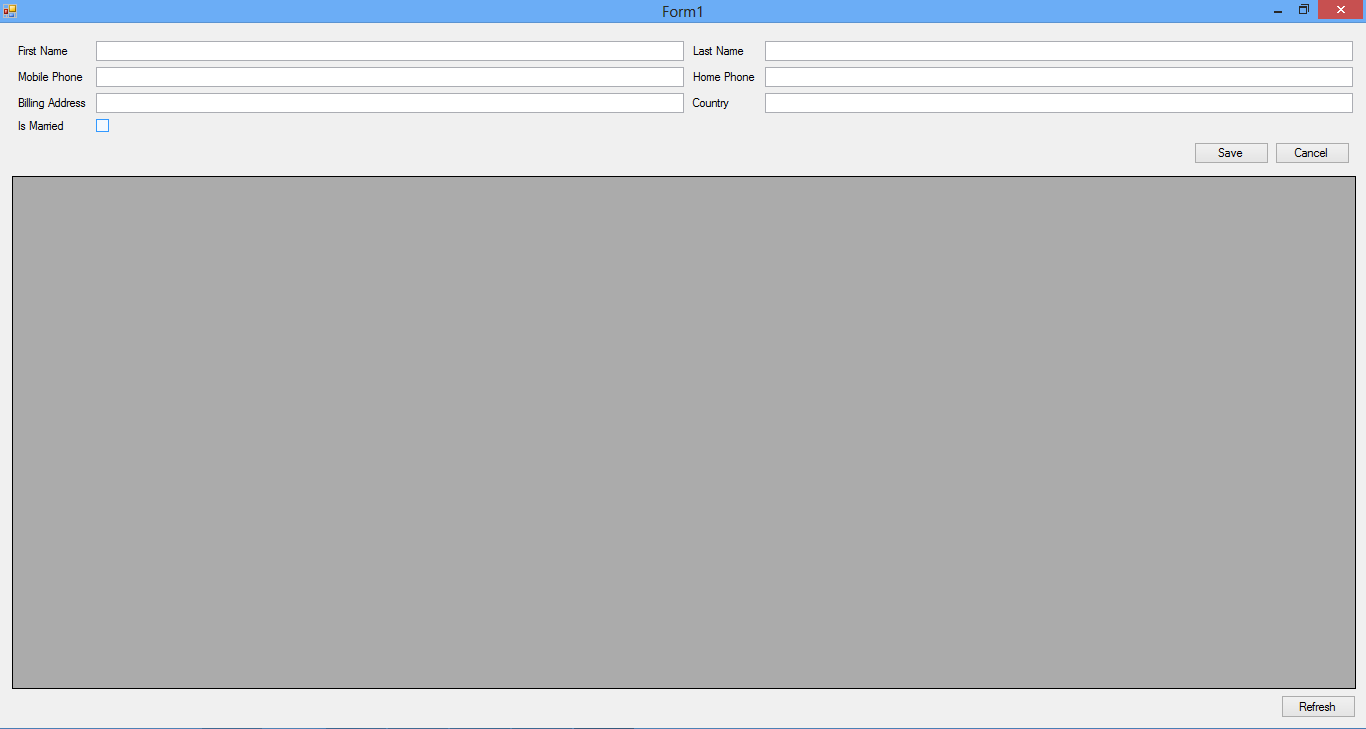
Begin by creating a new Windows Forms applications and set your design as below. I personally like to use table layout panels to design my forms, you can check a small tip I have written on this to give you a better idea about this control: Designing the Layout of Windows Forms using a TableLayoutPanel, with auto-expand panels.
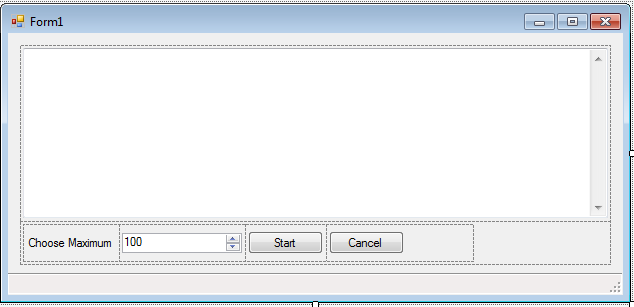 Basically, we will have a text box (set to multiline mode) to show the results coming from our working thread, a numeric box to allow us to choose a number, a start button and a cancel button. We will also have a status strip with a status label, to show the progress from our task.
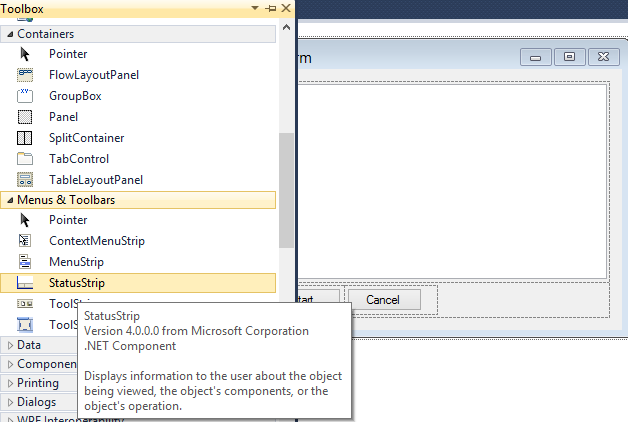
From the toolbox menu, under the Menus & Toolbars section, add a "Status Strip".
Basically, we will have a text box (set to multiline mode) to show the results coming from our working thread, a numeric box to allow us to choose a number, a start button and a cancel button. We will also have a status strip with a status label, to show the progress from our task.
From the toolbox menu, under the Menus & Toolbars section, add a "Status Strip".
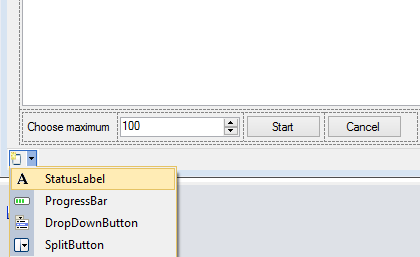
Inside the status strip, click the small arrow on the left corner and add a "Status Label". Rename the label tolblStaus, and set its Text property to an empty string.
 Before we begin, keep in mind that only the main thread has access to the user controls, so we have to capture the user input from the main thread, and pass it to the background thread somehow.
Right click your form and select "View Code", type down the below method:
Before we begin, keep in mind that only the main thread has access to the user controls, so we have to capture the user input from the main thread, and pass it to the background thread somehow.
Right click your form and select "View Code", type down the below method:
 private async void RunTask()
        {
            int numericValue = (int)numericUpDown1.Value;//Capture the user input
            object[] arrObjects = new object[] { numericValue };//Declare the array of objects

            using (Task<string> task = new Task<string>(new Func<object,
            string>(PerfromTaskAction), arrObjects, cancellationToken))//Declare and
                                                                       //initialize the task
            {
                lblStatus.Text = "Started Calculation...";//Set the status label to signal
                                                          //starting the operation
                btnStart.Enabled = false; //Disable the Start button
                task.Start();//Start the execution of the task
                await task;// wait for the task to finish, without blocking the main thread

                if (!task.IsFaulted)
                {
                    textBox1.Text = task.Result.ToString();//at this point,
                    //the task has finished its background work, and we can take the result
                    lblStatus.Text = "Completed.";//Signal the completion of the task
                }
                btnStart.Enabled = true; //Re-enable the Start button
            }
        }
Here, we first got the user input from the numeric box, created an array of objects, then added the value from the numeric box to this array. We will be passing this array of objects to the background thread, since only the main thread has access to the user controls. After that, we will initialize a Task<String> object, the <String>means that our Task will return a String object.
After that, we set our status label to "Started Calculation...", to signal to the user that our background operation has started. Then we will start our Task, using task.Start();. Then we will wait for the task using the awaitcommand. This is different from the wait command because it does not block the main thread, the execution will be done asynchronously, thus the use of the async keyword in the method declaration.
Now, before we write the code that will be executed in the background thread, let us write a simple method that will simulate a heavy operation (call to a remote server, request data from database, complex operation...), we will just call Thread.Sleep for a 100 milliseconds before returning the result:
private int PerformHeavyOperation(int i)
        {
            System.Threading.Thread.Sleep(100);
            return i * 1000;
        }
Now, we create the method that will be executed by the Task in the background thread, similar to DoWork event in the background worker:
private string PerfromTaskAction(object state)
        {
            object[] arrObjects = (object[])state;//Get the array of objects from the main thread
            int maxValue = (int)arrObjects[0];//Get the maxValue integer from the array of objects

            StringBuilder sb = new StringBuilder();//Declare a new string builder to build the result

            for (int i = 0; i < maxValue; i++)
            {
                sb.Append(string.Format("Counting Number: {0}{1}",
                PerformHeavyOperation(i),
                Environment.NewLine));//Append the result to the string builder
            }

            return sb.ToString();//return the result
        }
Finally, double click the start button, and type the below in the click event handler for this button. This will start our task.
  private void btnStart_Click(object sender, EventArgs e)
        {
            RunTask();
        }
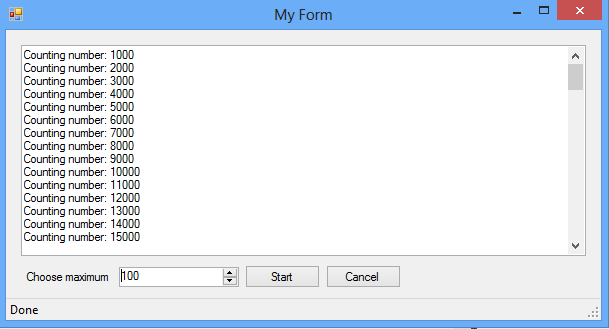
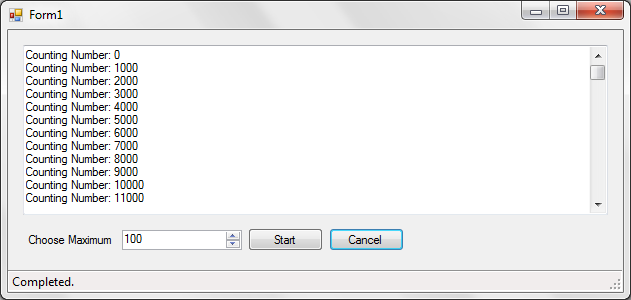
Run the form, and click start, you will notice that the form will begin to calculate, remain responsive during the calculation period, and finally will show you the desired result.
async keyword), or in the best cases, hard to add and will end up in hidden bugs.lblStaus, and set its Text property to an empty string.Task<String> object, the <String>means that our Task will return a String object.task.Start();. Then we will wait for the task using the awaitcommand. This is different from the wait command because it does not block the main thread, the execution will be done asynchronously, thus the use of the async keyword in the method declaration.Thread.Sleep for a 100 milliseconds before returning the result:DoWork event in the background worker:Reporting Progress from the Task
It would be nice if we can show the user the progress of our operation, like a status message or a loading progress bar. As we have mentioned before, we cannot access the user interface directly from the background thread, thus we must find a way to report progress to the main thread from the background thread. For this, we will use a Progress<T> object. In my sample, I will be reporting progress as a string, thus declare an object at the top of your code of Type Progress<String> like below:
Progress<string> progressManager =
new Progress<string>();//Declare the object that will manage progress, and
  //will be used to get the progress form our background thread
In the form constructor, add the following line of code, this will set the progress changed event.
progressManager.ProgressChanged += progressManager_ProgressChanged;//Set the Progress changed event
The form constructor will now look like this:
 public Form1()
        {
            InitializeComponent();
            progressManager.ProgressChanged += progressManager_ProgressChanged;//Set the
                                                                               //Progress changed event
        }
Implement the ProgressChanged event, we are just setting the text we received from the background thread to our status label. This event is fired inside the main thread, that's why we are able to access the status label.
 void progressManager_ProgressChanged(object sender, string e)
        {
            lblStatus.Text = e;
        }
Change your perform Task Action method to the below, notice how we are using the progress manager to report progress from our background thread:
     private string PerfromTaskAction(object state)
        {
            object[] arrObjects = (object[])state;//Get the array of objects from the main thread
            int maxValue = (int)arrObjects[0];//Get the maxValue integer from the array of objects

            StringBuilder sb = new StringBuilder();//Declare a new string builder to build the result

            for (int i = 0; i < maxValue; i++)
            {
                sb.Append(string.Format("Counting Number: {0}{1}",
                PerformHeavyOperation(i), Environment.NewLine));//Append the result
                                                                //to the string builder
                ((IProgress<string>)progressManager).Report(string.Format
                ("Now Counting number: {0}...", i));//Report our progress to the main thread
            }

            return sb.ToString();//return the result
        }
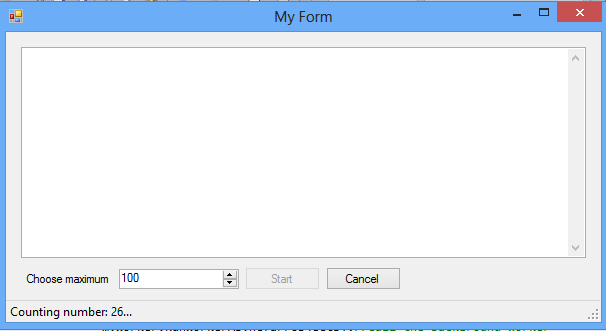
Now run your form, you will notice that the label will show you the progress update:

Progress<T> object. In my sample, I will be reporting progress as a string, thus declare an object at the top of your code of Type Progress<String> like below:ProgressChanged event, we are just setting the text we received from the background thread to our status label. This event is fired inside the main thread, that's why we are able to access the status label.Canceling a Running Task
It is always desirable to allow the user to cancel a task that is taking too long to complete, or in case the user is not interested anymore in the result.
To cancel a running task, we will need a Cancellation Token, and to get a cancellation token we will need a cancellation token source. Luckily, there are two Microsoft classes that give you exactly what you want, theCancellationTokenSource and the CancellationToken. Begin by declaring aCancellationTokenSource object, and then declare a CancellationToken object:
 CancellationTokenSource cancellationTokenSource; //Declare a cancellation token source
 CancellationToken cancellationToken; //Declare a cancellation token object,
  //we will populate this token from the token source, and pass it to the Task constructor.
Double click your "Cancel" button and add the following line of code to the event handler, this will issue a cancellation request to the cancellation token:
cancellationTokenSource.Cancel();
In your RunTask method, add the cancellation token to the constructor of your Task, also initialize theCancellationTokenSource object, and give the CancellationToken a new Token. We have to do this before each start of the task, because cancellation tokens can't be reused after they have been canceled, if we attempt to run a task that has its cancellation token in the canceled state, you will get a runtime error.
 private async void RunTask()
        {
            int numericValue = (int)numericUpDown1.Value;//Capture the user input
            object[] arrObjects = new object[] { numericValue };//Declare the array of objects

            //Because Cancellation tokens cannot be reused after they have been canceled,
            //we need to create a new cancellation token before each start
            cancellationTokenSource = new CancellationTokenSource();
            cancellationToken = cancellationTokenSource.Token;

            using (Task<string> task = new Task<string>(new Func<object,
            string>(PerfromTaskAction), arrObjects, cancellationToken))//Declare and initialize the task
            {
                lblStatus.Text = "Started Calculation...";//Set the status label to signal
                                                          //starting the operation
                btnStart.Enabled = false; //Disable the Start button
                task.Start();//Start the execution of the task
                await task;// wait for the task to finish, without blocking the main thread

                if (!task.IsFaulted)
                {
                    textBox1.Text = task.Result.ToString();//at this point,
                     //the task has finished its background work, and we can take the result
                    lblStatus.Text = "Completed.";//Signal the completion of the task
                }

                btnStart.Enabled = true; //Re-enable the Start button
            }
        }
Change your PerformTaskAction method to check for cancellation requests at each iteration in your loop, if you find out that the user issued a cancellation request, you break out of the loop, thus bring the execution of the background thread to an end. You can check if a cancellation request is pending by checking theIsCancellationRequested property of the Cancellation Token. Another method will be to use theCancellationToken.ThrowIfCancellationRequested() method to throw an AggregateExceptionthat will stop your background thread, and you can catch this exception from the main thread to know that the task was canceled.
private string PerfromTaskAction(object state)
        {
            object[] arrObjects = (object[])state;//Get the array of objects from the main thread
            int maxValue = (int)arrObjects[0];    //Get the maxValue integer from the array of objects

            StringBuilder sb = new StringBuilder();//Declare a new string builder to build the result

            for (int i = 0; i <= maxValue; i++)
            {
                if (cancellationToken.IsCancellationRequested)//Check if a cancellation request
                                                              //is pending
                {
                    break;
                }
                else
                {
                    sb.Append(string.Format("Counting Number: {0}{1}",
                    PerformHeavyOperation(i), Environment.NewLine));//Append the result
                                                                    //to the string builder
                    ((IProgress<string>)progressManager).Report(string.Format
                    ("Now Counting number: {0}...", i));//Report our progress to the main thread
                }
            }

            return sb.ToString();//return the result
        }
Now try it, run the form and try to cancel your task while it is running, and check if your code works. You can dowload the sample from here
Cancellation Token, and to get a cancellation token we will need a cancellation token source. Luckily, there are two Microsoft classes that give you exactly what you want, theCancellationTokenSource and the CancellationToken. Begin by declaring aCancellationTokenSource object, and then declare a CancellationToken object:RunTask method, add the cancellation token to the constructor of your Task, also initialize theCancellationTokenSource object, and give the CancellationToken a new Token. We have to do this before each start of the task, because cancellation tokens can't be reused after they have been canceled, if we attempt to run a task that has its cancellation token in the canceled state, you will get a runtime error.PerformTaskAction method to check for cancellation requests at each iteration in your loop, if you find out that the user issued a cancellation request, you break out of the loop, thus bring the execution of the background thread to an end. You can check if a cancellation request is pending by checking theIsCancellationRequested property of the Cancellation Token. Another method will be to use theCancellationToken.ThrowIfCancellationRequested() method to throw an AggregateExceptionthat will stop your background thread, and you can catch this exception from the main thread to know that the task was canceled.


 .
.